Create a Secret Santa application using Intrexx (Part 1)
It’s almost the holiday season, and you probably know what that means: gifts, gifts, and more gifts! Of course, no winter holiday would be complete without the Secret Santa tradition. But now you’re facing a conundrum: should you create a group chat, start drawing names, and try your best not to leave anyone out? Or… should you use an online application instead? The latter certainly sounds much more convenient! But what if you could take it a step further and develop your very own Secret Santa application to use year after year?
This post will show you how to build your Secret Santa app using the low-code platform Intrexx. Let’s get started!
Some prerequisites:
- Make sure you have an Intrexx Portal already set up.
- Make sure you have Intrexx Portal Manager 12 installed on your computer.
- You can find more information about the initial setup here.
First, we will start by creating a new empty application in Intrexx and call it “Secret Santa Intrexx App”. At first, your app should look like this:
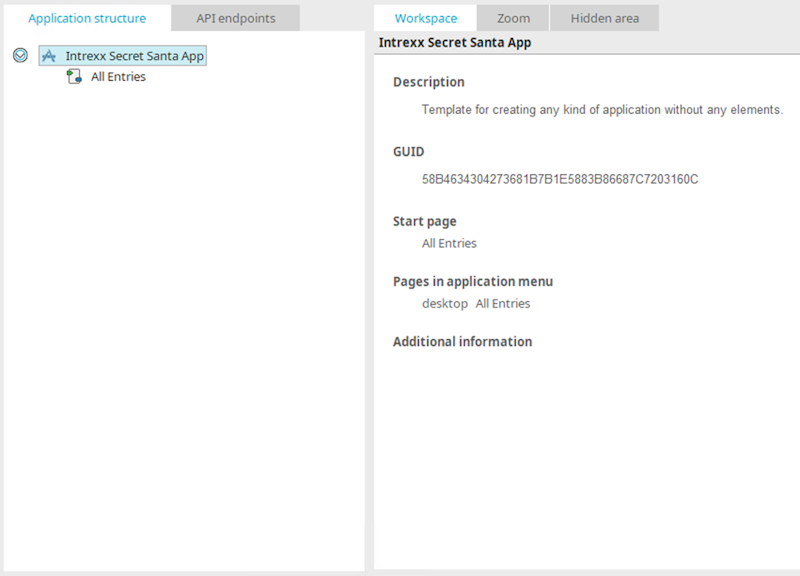
1. Create your data groups (database tables)
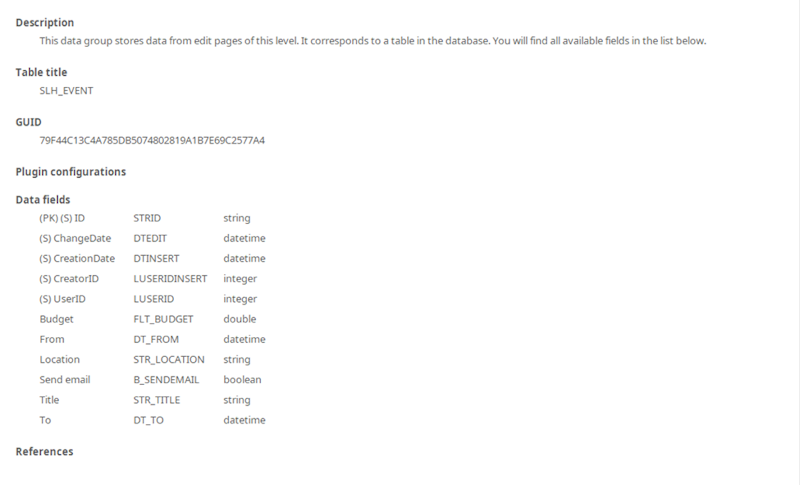
We will create our data groups. Create a new data group called “Event” and add the following data fields: Budget, From, To, Location, and Title. (Pay attention to their data type!)
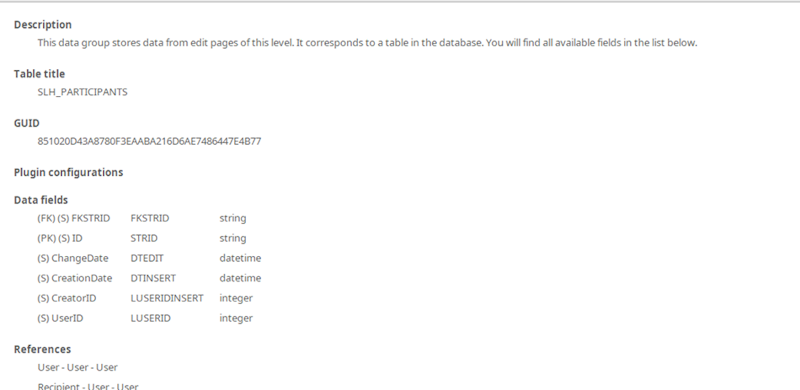
Now, we will create another data group named Participants, a child data group for events. To create a child data group, right-click on Events data group, select New, then choose Data group. Here, we will only add two references (User and Recipient) to our User table (already created by Intrexx).
2. Create your view and edit pages
First, create a new edit page for the data group Event (Right-click on Event > New > Edit page). On this page, the users can fill in their event information. Start by configuring a grid element, then add your edit fields for the event data fields. Next, create your save, delete, and cancel buttons, which should redirect back to the “All entries” page. Alternatively, you could use the Intrexx page wizard, which helps you achieve the same functionality with little effort.
If this is your first time creating an Intrexx application, I suggest you use the page wizard. More information here.
In the application preview, your page should look like this:

The next page we are going to create is “Edit participants”. On this page, the user should edit the list of participants for their event. Like in the previous page, you can start by configuring a grid element, then add save and cancel buttons (no delete button!). The save button should redirect to the same “All entries” page. I recommend copying the grid from your “Event” page and deleting the input fields From, To, Title, Location and Budget. Instead, we will add a multiple selection control that will show all people not yet invited on the left side, and all invited people on the right side.
When configuring the multiple selection control, you should:
- Set the data source to the data group “User” from the application “User”. This setting will display all the entries from “User” in our selection list.
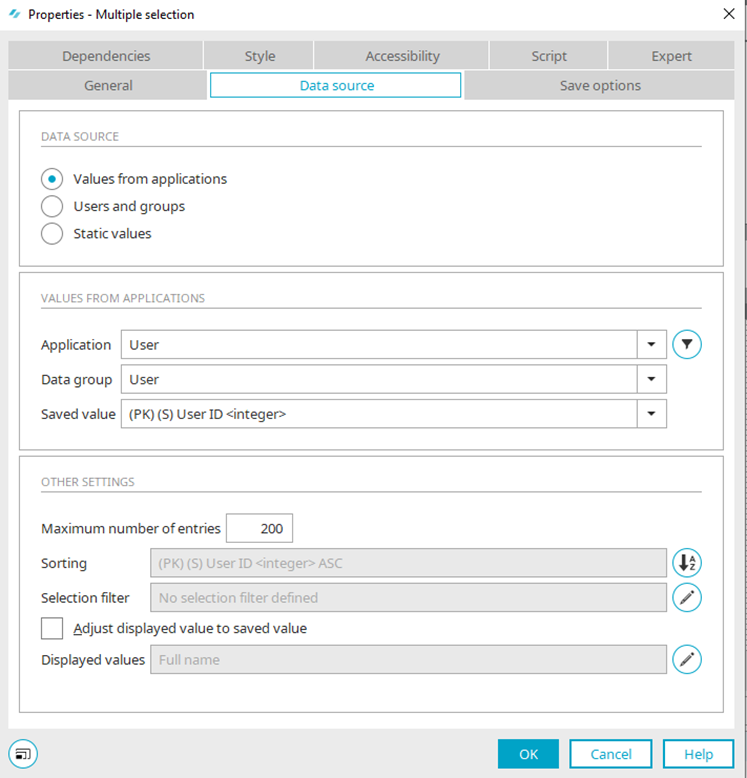
- In the “Save options” tab, select “Data group” and select “Participants”. The following setting will save the selected users in our participants' data group.
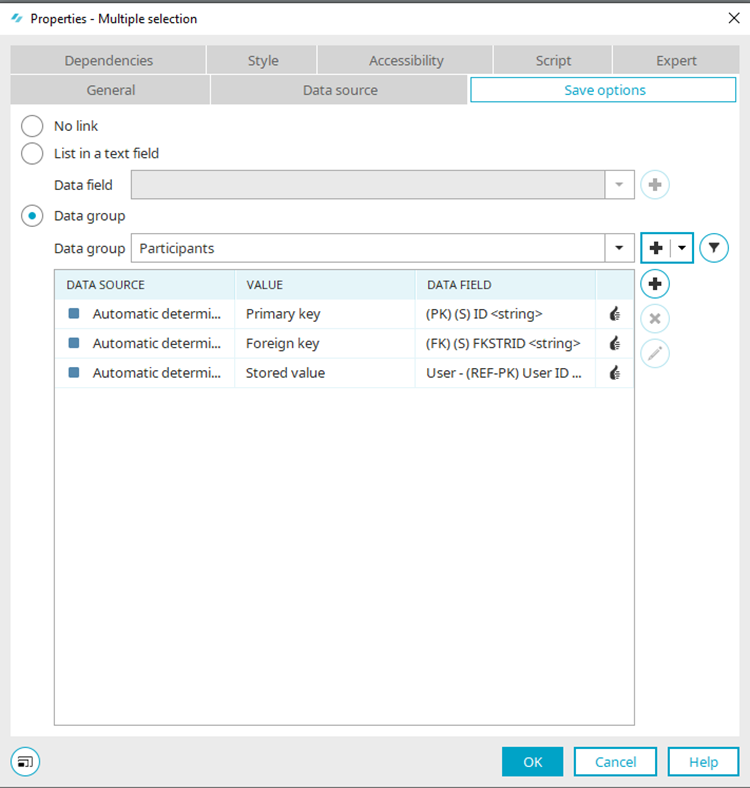
More information on multiple selection control can be found here.
This is how the page “Edit participants” should look in your application preview:
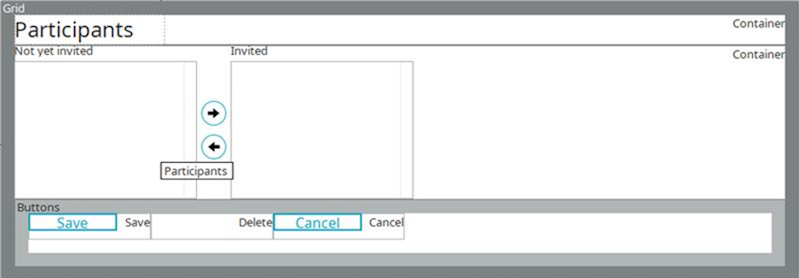
Optionally, you can create a view page named “View participants” using a view table control to display a read-only version of the “Edit participants” page. Remember, this page should not have a save/delete button, only a cancel button that will be used to close the tooltip.
Finally, rename the “All Entries” page to “All Events”. This is the start page of our application. You will only have to create two elements on this page:
A button “Create event” that will open the “Event" page to create a new record in data group “Event”. In the tab “Destination options,” make sure to check the “open as tooltip” and “open modal” checkboxes.
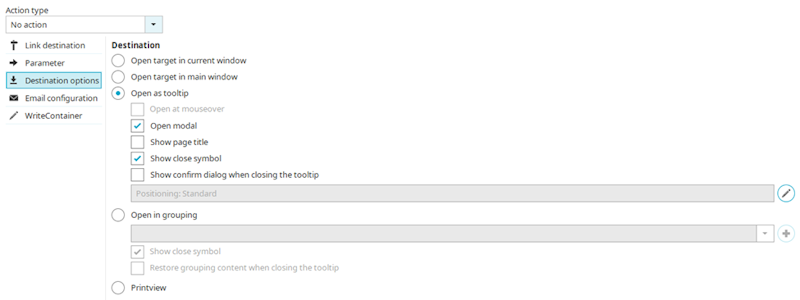
A view table that will display the data of your event, along with two buttons: a user icon that redirects to “Edit participants” and a pencil icon that redirects to “Event” in edit existing record mode. If you have also created “View participants” page, you can make the user icon redirect to that page instead. More information on view tables here.
3. We are almost done!
Preview of start page:

You should publish your work now! At this point, your application structure should resemble this picture:
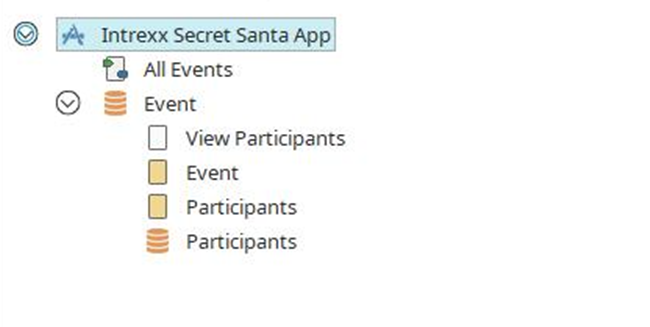
If you followed these steps, here is how your application should look from a user’s point of view:
Start page

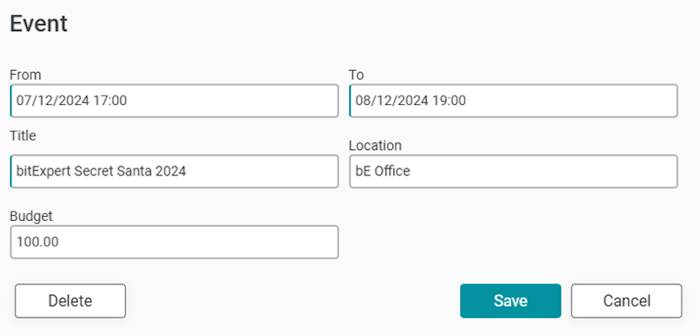
Add/Edit Event page:
Participants page

Not finished yet: your application now offers a way of storing information about events and adding/removing participants. There is one important thing missing: the shuffle process that will assign a recipient to each participant and send an email once the event is started. We will explore the implementation of this logic in the next part of this blog post series.
