Automated replies with Office 365

After our move to Office 356, I absolutely missed one feature: The ability to script automated email replies with a Sieve filter. The mail rules implemented in Office 365 Outlook Online can do a lot of things, but not send email replies.
I kept wondering how to solve this issue and almost thought about writing a small daemon that would use the MS Graph API to interact with my emails and send replies based on some custom logic. However, I realized that the same functionality might be able to achieve with Powerautomate. After diving deeper into PowerAutomate, it became clear that all needed APIs and functionality are there to achieve the same functionality as I used back in the days with my custom Sieve script.
First, why am I doing this? Having my work email account for about 19 years and using my email address on a lot of sites, a lot of people send me offers of any kind every day. Even worse, they ping me constantly until I reply (or until they get angry because I don't reply). At some point, I decided for my peace of mind to send automated replies and move all those emails to trash.
With Outlook 356 and PowerAutomate, this is how I have set things up: The process is divided into 2 parts: An Outlook rule and the PowerAutomate script. First, I created a folder called Spam in my Inbox and a rule in Outlook to move all mails for a given list of recipients into this folder. I felt it is easier to add new email addresses to an Outlook rule than to modify the PowerAutomate script. You could totally do all of the logic in PowerAutomate if you feel this makes more sense to you.
In PowerAutomate, I created a new "Automated clod flow" that gets triggered for every new email that arrives in the folder "Spam" I created earlier. That means the flow will start for any email moved in the folder by the Outlook rule or when I manually drag emails into that specific folder.
While creating the new flow, I choose the "When new email arrives (V3)" trigger as the starting point. In the configuration, I choose the folder "Spam" as the folder to check for new emails.

Next, I decided it would be cool to not send the automated response when the email sender already got my out-of-office notification email. The status can be queried by using the "Get mail tips for a mailbox (V2)" action.
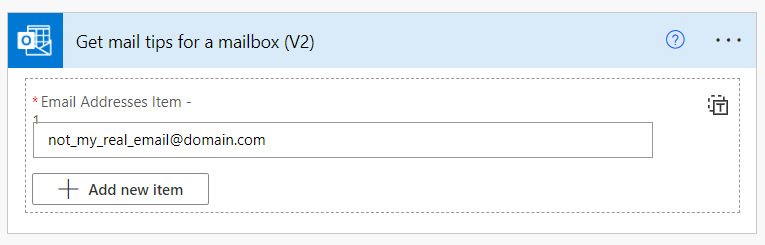
When we have the needed information, in the next step, we add a condition to decide if the automated response should
be sent or not. We check if the expression empty(body('Get_mail_tips_for_a_mailbox_(V2)')?['value'][0]['automaticReplies']?['message'])
is true. Having no automated reply configured means, I have no out-of-office reply active, and thus the response can be sent.

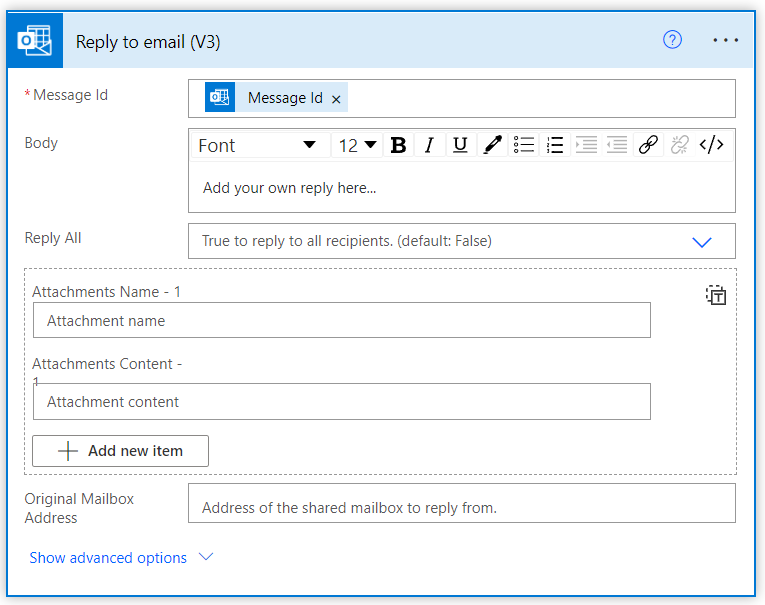
In the "If yes" branch, we send the automated reply to the sender of the original email. In the "If no" branch, we won't do anything. Add the "Reply to email (V3)" action to the yes branch and configure it: The action requires the message Id of the email you want to reply to. Luckily we know that thanks to the initial trigger, pick "Message Id" from the dynamic content list. Also, configure your own reply text in the body field. If you want to go crazy, you can use the email sender's name as a variable in your reply. I decided not to do that.
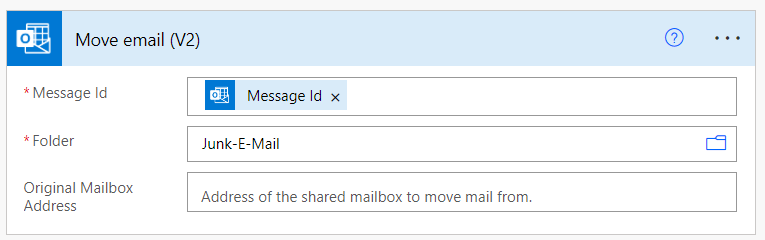
As a final step running after the condition, the email gets moved to the Junk folder. If you want, you could delete the email, but I decided to keep track of them for a while just to make sure the script works as intended. Add the "Move email (V2)" action, configure the Message Id of the email to move as well as the target folder. As before, for the Message Id, we pick the "Message Id" variable from the dynamic content list. The target folder can be chosen from the UI.
Done! You can test the flow by running it and manually dragging emails to the "Spam" folder that was configured in the beginning. Once everything works, just save and activate the flow and wait for the first emails to arrive.
I have the flow running for about 6 months and in general, I am quite happy with it. Sometimes, the flow is not running fast enough and my email client Thunderbird already fetched the email and classified it as Junk. If I realized that no reply was sent, I sometimes drag the email manually to the Spam folder.